- Eye Makeup
- Eye Makeup
- Monolid Eyes
- Eyeliner
- Eyeshadow
Makeup for Monolid Eyes: Shadow, Liner and Lashes
Vella Beauty Editors••11 min read
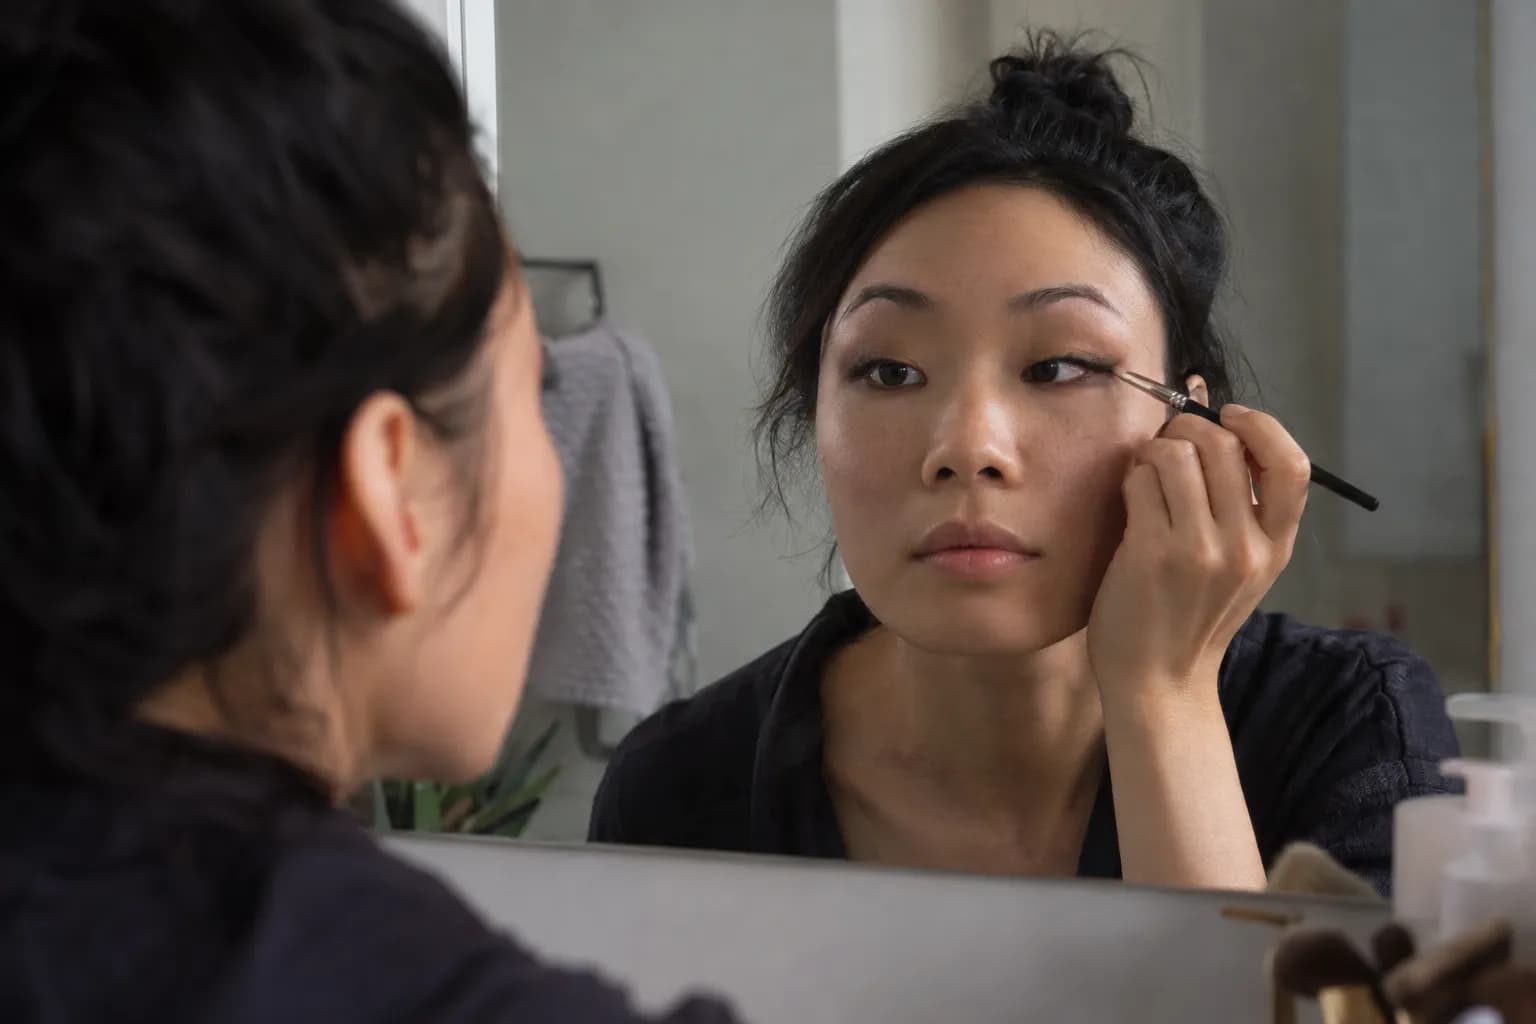
For makeup for monolid eyes, build shadow from deep at the lash line to soft above it, check eyeliner with your eyes open, and curl lashes before mascara. You do not need to create a crease or change your eye shape to get definition. This guide covers placement, shade combinations, visible liner thickness, lash technique, and fixes for disappearing or transferring makeup.

See your colors on your face
Vella Studio finds your color season from a selfie and tries makeup looks on your own photo.
Map your makeup for monolid eyes with eyes open
A monolid generally has no distinct, visible upper-lid crease. That describes one feature, not your entire eye shape: your eyes can also be elongated, rounded, upturned, or downturned, with different amounts of skin resting over the lash line. The monolid eyes guide gives you another reference for understanding that feature.
Before applying anything, look straight ahead into a mirror at eye level. Relax your forehead and eyebrows. Raising your brows creates temporary lid space that disappears when your face returns to rest. If you’re unsure how to describe your shape, use the five-step eye shape test to check your eye opening, crease, and corner tilt separately.
Identify three areas:
- The lash-line zone: where you will place your deepest shadow and liner.
- The visible lid zone: the skin you can see directly above the lashes with your eyes relaxed. Its height may vary across the eye.
- The upper fade zone: where shadow should gradually soften into bare skin, usually well below the brow rather than against it.
There is no universal boundary between these zones. Use them as a placement map, not a template with fixed measurements.
Apply a thin layer of eye primer if your makeup tends to move, and let it set according to its directions. Avoid leaving a thick layer of concealer on the lid; it can give shadow and liner more product to slide around on.
Build a gradient instead of searching for a crease
A lash-to-brow gradient creates dimension without relying on crease placement. The darkest color sits close to the lashes, a medium tone carries the color upward, and the top edge becomes sheer. You can keep it barely visible or extend it into a smoky shape.
Choose three shades with a clear depth difference
Start with a soft transition color, a medium shade, and a deeper accent in a related family. These combinations are useful starting points:
- Warm neutrals: caramel, warm taupe, and espresso.
- Cool neutrals: dusty rose, mauve taupe, and charcoal brown.
- Soft warmth: muted peach, terracotta, and brick red.
- Rich color: muted plum, aubergine, and near-black plum.
Choose depth relative to your skin rather than automatically reaching for beige. A medium tan shade may look like a transition on fair skin but disappear on deeper skin; caramel, cocoa, or plum may create a clearer progression. If you are unsure which color direction you prefer, the guide to finding your undertone can help you narrow the options.
Place and blend the gradient
- Map the medium shade with your eyes open. Use a small brush to mark where you want color to remain visible above the lash-line area. Begin over the outer half, then work inward with less product.
- Lower your gaze and connect the color downward. Fill from that visible boundary toward the lashes. This prevents a disconnected stripe floating above bare skin.
- Add the deepest shade near the lashes. Press it along the outer half or outer two-thirds, keeping the inner portion lighter if you want a softer result.
- Blend the joins, not the whole lid. Use tiny strokes where the deep and medium shades meet. Sweeping one brush over everything can turn three distinct depths into one muddy color.
- Soften the upper edge. Use the transition shade sparingly, then finish with a clean brush. Stop when the edge fades rather than continuing toward the eyebrow.
- Look straight ahead again. If the gradient vanishes, raise only the medium shade and its softened edge slightly. You do not need to move the darkest color upward too.
For shimmer, press a small amount of fine satin or shimmer onto the central visible lid. Keep the lash-line depth intact so the reflective finish does not replace all your definition.
Find liner thickness that actually shows
The right eyeliner thickness is the amount that gives you the visible effect you want with your eyes relaxed. For one monolid, that may be a hairline along the lashes; for another, a wider outer band will be needed. A thick black stripe across the entire lid is not a requirement.
Build your visible line in small increments
Start with a sharpened pencil or a small angled brush and gel liner. Brown, espresso, charcoal, and blackened plum allow you to build definition; black gives a more graphic contrast.
- Dot along the upper lash roots. Work on the skin just above the lashes rather than pulling the lid upward or placing product on the inner rim.
- Connect the dots into a narrow line. Keep the inner third especially fine, or leave it unlined if that suits your look.
- Open your eyes fully and relax. Check the center and outer third separately. Some areas may hide more liner than others.
- Add a small amount only where needed. Increase the outer half first if you want elongation. Increase the center slightly if you want more visible definition there.
- Stop before the liner consumes your gradient. If making the line visible requires more darkness than you want, keep the lash-root line subtle and use a visible shadow edge or wing instead.
A line can define your lashes even when it does not read as a separate stripe. Visibility is a styling choice, not a test you have to pass.
Draw the wing with your eye open
Place a small dot where you want the wing to end, beyond the outer corner. Connect the outer lash line to that point while looking forward, then lower your gaze to fill any gap. Keep the tail short at first; it is easier to extend than to shorten.
If the skin at your outer corner changes the wing when you blink, adjust the angle or move its visible endpoint slightly outward. The finished shape may look less conventional with your eye closed, which is fine: judge it in the position people usually see.
Let liner set before blinking firmly. For a softer finish, press matching powder shadow over pencil without blending its top edge all the way into the transition shade.
Curl lashes for lift without forcing the shape
Monolids do not automatically mean straight lashes, but lashes that point downward can hide both their length and the liner behind them. Curling can make the lash tips more visible without adding extra darkness to the lid.
A gentle curling sequence
- Start with clean, dry lashes before mascara. Check that the curler pad is intact and the tool is clean.
- Fit the curler before squeezing. Look slightly downward and position your upper lashes inside the opening. Keep the pad clear of your eyelid skin.
- Close gently near the roots. Hold briefly without tugging. If you feel pinching, release immediately and reposition.
- Move a little farther along the lashes. Add a lighter press at the middle, then toward the tips if their length allows. This creates a curve rather than a sharp right-angle bend.
- Apply a light coat of mascara. Work from the roots outward and separate clumps before they set. Keep heavy buildup off the tips if it pulls the curl down.
If you cannot catch the outer lashes without pinching the inner corner, the curler's curve or width may not suit your eye. Do not squeeze harder to compensate. A differently shaped or smaller section curler may give you more control.
For optional false lashes, start with a lightweight half lash or a few short outer clusters. Very dense strips can hide your gradient; exceptionally long outer fibers can also pull the visual shape downward. Follow the lash adhesive's directions and keep it out of the eye.
Match the placement to the look you want
The same gradient can become understated, rounded, or elongated by changing where you concentrate depth. Use this table to choose a starting point rather than treating one look as the correct monolid technique.
| Goal | Shadow families and placement | Liner approach | Lash emphasis |
|---|---|---|---|
| Soft everyday definition | Warm taupe or cocoa, deepest just above the lashes | Fine espresso line, slightly fuller at the outer third | Light, separated curl throughout |
| Elongated smoky eye | Charcoal brown or aubergine, blended outward at the outer third | Tapered outer band with a short wing | Emphasize lashes just outside the center |
| Fresh rosy makeup | Dusty rose or muted berry over the visible lid, plum at the roots | Thin brown or blackened plum line | Defined central lashes |
| Reflective evening eye | Bronze or pewter satin at the center, deep brown at the base | Crisp outer line with restrained thickness | Lifted lashes without a dense strip |
For more drama, use the smoky eye makeup guide for color inspiration while keeping your own open-eye placement map.
Lower-lash shadow is optional. For a subtle connection, use the leftover medium shade on your brush along the outer third of the lower lash line. Connect it gently to the upper outer shadow, then stop. You do not need a dark ring around the entire eye to make the look feel finished.
Common monolid myths you can ignore
“You need to draw a fake crease”
You can experiment with a drawn crease as a graphic effect, but it is not necessary for dimension. A smooth gradient provides depth without pretending that a fold exists. A hard arc above the lid can look disconnected if it does not relate to the rest of your shadow.
“Monolids cannot wear shimmer”
Shimmer is a finish, not a restriction tied to eye shape. Fine reflective shadow on the central visible lid can create a focal point. If you dislike the result, try a smaller placement or a smoother satin finish before ruling it out entirely.
“All monolids need thick liner”
Lid coverage varies, even between your two eyes. A fine lash-root line, a smoked pencil edge, or an outer-corner wing can all work. You only need a broad band if that is the effect you want.
“Monolid and hooded mean the same thing”
They describe different features. A monolid generally lacks a distinct visible crease, while a hooded eye has skin that overhangs a crease and conceals some lid space. Folds can be subtle or partly hidden, and a single label may not capture every detail; visible space and skin movement are more useful for placement.
“The goal is to make your eyes look bigger”
It can be, but it does not have to be. You can emphasize length, create a soft wash of color, or choose a compact graphic line. Your natural shape is the starting point, not a problem to correct. If you also have a round face and want ideas for framing your features beyond makeup, explore these hairstyles for a round face.
Diagnose disappearing shadow, smudges, and uneven liner
When a look is not working, change one variable at a time. Check your eyes straight ahead, then lower your gaze to see where the product actually sits.
- Shadow disappears when you open your eyes: Your medium shade probably ends inside the concealed lid area. Bring that shade slightly higher while keeping the darkest color near the lashes.
- The whole eye looks muddy: You may have blended every shade together or carried the deepest shade too high. Remove excess with a clean brush and restore a narrower dark base and softer upper edge.
- Liner leaves a matching mark above it: This suggests contact transfer. Let each layer set, use less emollient product underneath, and try a longer-wearing liner formula. Check whether excess mascara is contributing too.
- The wing looks right only when you lift your brow: You mapped it on stretched skin. Relax your forehead and redraw the visible tail before filling its base.
- One eye looks more heavily lined: Compare the visible amount of liner, not the amount you applied. Slightly different line widths may produce a more balanced open-eye result.
- Curled lashes still vanish behind a dark lid: The issue may be contrast rather than curl. Reduce the height of the darkest shadow and separate the lashes so the tips remain distinct.
Take a quick front-facing photo in even light as a final check. It can make uneven visible placement easier to spot than a magnifying mirror, which encourages you to focus on tiny details rather than the whole look.
Check your shape and preview placement with Vella
If you are unsure how to describe your eyes, start with the free Eye Shape Quiz. Treat the result as a starting point and compare it with what you see while blinking and looking straight ahead.
The Vella Studio app can map an eyeliner shape to your eyes and draw it on your photo. Its photorealistic makeup try-on and before/after slider also let you compare a softer look with a more defined one on your own face. Use the preview to choose a direction, then confirm liner visibility and shadow placement in a mirror; a still photo cannot show every movement of your lids.
Frequently asked questions
Where should you put eyeshadow on monolid eyes?
Keep the deepest shade close to the upper lashes, place a medium shade above it, and soften the upper edge with a lighter transition color. Check with your eyes open so the medium shade remains visible. You do not need to place shadow in an imaginary crease.
How thick should eyeliner be on monolids?
There is no fixed thickness that works for every monolid. Start with a fine line at the lash roots, relax your eyes, and add small amounts where you want more visible definition. You can also keep the lid line subtle and make only the outer wing visible.
Can monolid eyes wear shimmer eyeshadow?
Yes, monolid eyes can wear shimmer, satin, or metallic shadow. Try a small amount on the central visible lid while keeping a deeper shade near the lashes. Adjust the size of the reflective area to suit the effect you want.
Should you curl lashes before or after mascara?
Curl clean, dry lashes before applying mascara. Position the curler clear of your eyelid skin and use gentle presses rather than pulling or squeezing harder. If it repeatedly pinches or misses the outer lashes, try a different curler shape.
Are monolid eyes the same as hooded eyes?
No. A monolid generally has no distinct visible upper-lid crease, while hooded eyes have skin that overhangs a crease and hides some lid space. Because folds and coverage vary, checking your actual visible lid area is more useful for makeup placement than relying on a label alone.
Try it on your own face
Vella Studio finds your color season and shows every look on your photo — every shade named, so you know exactly what to buy.